How to: Arrow Cresting
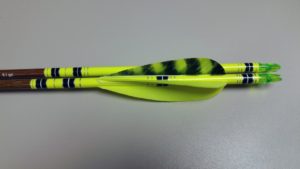
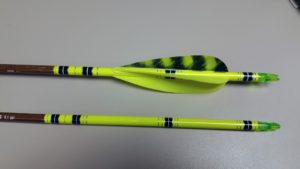
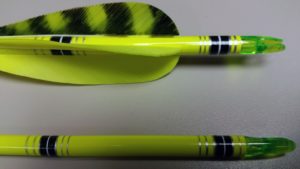
The other day James, one of our traditional archery technical experts, came up to me to show me his newly crested arrow. They’re pretty sweet, if I do say so myself, and after James told me how easy it was I decided to write a short “how to” post about it.
The short and sweet.
After appling carbon/aluminum prep put your arrow on a crester then, using a cresting brush, lay down your cresting paint. James put his cresting on a cap wrap, so he didn’t need to worry about using primer. He finished with a clear coat to keep his work looking great for a long, long time.
It sounds too easy, but it really is that simple. As long as you can hold your hand steady, with the appropriate tools just about anyone can crest an arrow – and make it look awesome.
Let’s get into the weeds a little bit.
The art of cresting dates back (at least) hundreds of years, as a means of arrow identification. In the days when everything was made by hand and each arrow was a work of art, the very idea that someone else might walk off with your arrow was likely appalling.
Recently, however, cresting has become a way of personal expression. Many archers choose to forgo cresting entirely, but few can deny the appeal of an arrow with a crisp crest.
The most important thing to remember when cresting an arrow is to take your time. The easiest way to mess-up an arrow is to try and hurry through the cresting. As with every part of traditional archery, quality takes time.
Your crest can be as simple or as complex as you want. If this is your first time cresting an arrow it might be a good idea to practice on an old “throw-away” shaft. This way you can get a feel for what you’re doing. You could also just apply the crest to a cap warp, as they’re pretty easy to take off.
Before you apply your first coat of paint, you should remember to wipe down the shaft with the arrow prep. (Note: If you’re not going to use a cap wrap, then you should apply two coats of finish to your bare shaft. Wait until each coat of clear finish has dried, then gently rub the shaft with #0000 steel wool until it’s smooth.)
Next, put down a strip of blue painters tape on your crester and mark your cresting pattern (it might be a good idea to make each mark on the tape the color you want on your arrow – this way you can see if you like the color combination or not).
Next, if you plan to use any bright or metallic colors you should first lay down a base coat of white. This will save you some time later and will limit the number of coats. Remember, it’s better to have good prep work, than it is to just glob on the paint. It’s better to have several thin layers than it is to have one thick coat.
As you move forward to your first coat of color remember to clean your brush often. Clean your brush between each arrow and between every color. When you put your brush in your paint remember to try and get an even amount every time – otherwise you won’t have a consistent finish. As you apply the paint, try not to leave the brush on the shaft for an extended period of time, especially with fast-drying paints, because this can lead to a rough-looking finish.
After your base layer, begin applying your cresting pattern; start with your wider bands and move down to your thinner bands.
It’s a good idea to add a thin line to separate colors; this will give your crest a clean finished look. To do this, you’ll need a very fine pointed brush and a steady hand.
After the shaft has had plenty of time to dry, apply a clear coat over the crested areas. (Note: if you’re cresting a wood arrow you should apply a clear dip to the entire shaft.)
You’re done. Cresting is a simple way to make your arrows look great and to showcase your pride as a traditional archer.

By Jason Mills


.jpg)


Great primer… Was a base coat used? If so, what kind of paint was used? I tend to use spray paint instead of dipping.